Friday, October 1, 2010

Wiring is complete!

Whew!  Boy, that took longer than expected.  But, it's pretty sweet.  I've finished all of the connections necessary to install my face plates and outlets.  Basically, I could hook up a battery, tomorrow, and see how it all works. 

The electric closet


So, that's it.  Everything I need for the electric infrastructure is there.  To the left, you can see the openings where my Iport and stereo will go.  I also have to add one 12 volt accessory outlet for the Iport to power the Ipod.  But, that's easy. 

Here is the D.C. circuitry.  Getting that all squared away was tedious but not too difficult. 


I like to keep things super clean and tidy, so if there are any problems, I can go through it and find out where the trouble is.  It's the right way to work. 

And, I added all of the clips necessary to attach the face plates and LED lights.


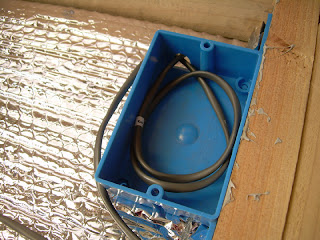
And, here's what the ceiling boxes look like.


I know it's all probably super boring, but to work it all out and to keep it clean and organized is quite the project.  I'm glad it's over and I have a tremendous amount of satisfaction at having completed that part of the Roving Home. 

I forgot to call the plastic company, today.  The guy said my water tanks would be ready in a week.  They've probably been sitting there, all this time, and now I'll have to wait before getting them, because my job requires me to be in L.A. every day, for the next couple of weeks.

Oh well.  It wasn't in the stars to finish this before my big job.  I'll be in Taiwan until June of next year.  It's going to be an amazing experience, but I'm half excited to go, mainly because I won't be seeing my girl, but also because I've invested all of this time, so far, to try and get the Roving Home completed before leaving, and now it just won't happen.  If I hadn't been called to work for two straight weeks prior to my departure, I think I may have had a chance.  But, I fear that this will be my last post of any substance with respect to the Roving Home. 

If anything changes, I'll let you know.  Come June, this blog will be up and running again, full speed, ahead.  I will dust off the table saw, lube up the drill press, back the rig into the driveway and hit it hard for about 3 weeks.  After that, it's all leisure time. 

Thanks for all of the comments and contribution to my blog.  If it weren't for a few people suggesting that I should set up a blog for this project, I never would have considered it.  But, I'm really glad I did.  The experience has been amazing and will serve as the ultimate scrap book for the Ultimate Roving Home. 


Wednesday, September 29, 2010

Avoiding certain tragedy!

In more ways than one, I seemed to avert what could have resulted in a couple of devastating consequences. 

First, and most importantly, was my realization that all it would take is a second wire to get the amperage I need from my 12 volt wall outlets.  Now, I know that you're just about on the edge of your seat, right this very moment.  So, just settle in, grab a cup o' joe and let your mind take you to amazing places.

The 12 volt wall outlet


For the life of me, I haven't been able to find out just how many amps these things are good for.  As you know, at 12 volts, a 20 amp receptacle would enable you to plug in an item worth approximately 200 watts.  Not a lot of power, there, but then again, all I really need to plug in are chargers of various sorts, perhaps a reading light, or maybe a small appliance. 

But, I still couldn't find out, on the Internet or through any company specs, what the amperage rating of these things are.  So, I punted, and ran enough wiring for 10amps.  I figured 10amps worth of power would still be fine, but after considering what 10amps will allow me, I started to second guess myself. 

This is the wire I'd need to run for 20amps of power.


That's one fat piece of 12 gauge wire. 

Definitely hard to conceal, but I am using it for the A.C. outlets powered by the inverter.  And, there are only 4 of them.  That wire is good for 20amps. 

And, this is the 10amp 16 gauge wire that I'm running for all of the lighting.


What's great about this wire is that it's red/black and enclosed in an outer sleeve. 

 I was really skeptical about running merely a standard two wire low voltage set up with all of the metallic insulation everywhere.


This black wire is what you'd find for sprinklers and outdoor low voltage lighting.  It's a two wire system, no outer sleeve, and with the positive and negative side distinguished only by a slight ridge on one of those black rubber sleeves -- a total pain in the butt to manage without the color delineation. 

 Yet, I was about to do that anyway, until I found that awesome two wire red/black stuff.


The thing about the red/black stuff is that it's marketed as "speaker wire," so it was in a different section of the electrical department.  Luckily, I stumbled upon it.  It's the same as the standard romex you'd find in home wiring, but lower amperage and stranded.  Stranded wire is important in an environment with lots of vibration.  And, flexibility is key.  

10amps is fine for all of my lighting circuits and it's very manageable wire to work with.


But, I still didnt' know the value of my 12 volt receptacles.

Until...

I was sitting in my girl's car, looking at the 12 volt accessory plug in the dash, the same way I have a million times, before.


But I noticed some writing on the front of that cap, there.

So, I flipped it up...


And, would you look at that???!!!

So, I had to rethink my 10amp wiring. 


That's a lot of wiring.  But, still not that big of a deal.  I'll just run another length of the 10amp stuff for each 12 volt accessory socket.


The electricity will find its balance and two 10amp wires connected into the same clip will work as one 20amp.  Plus, the size is still slimmer than that fat black stuff that's good for 20amps. 


I just need to double up an end like that.  I'll be using two wires instead of that one, for my addition to the 12 volt receptacles...


Add these clips...


And, there you go.  My new additions will look the same as that connection, but with two wires sticking into the back side of those clips, rather than the one wire. 

I'm glad I made the discovery of that 20amp outlet in the car. 

And, if it hadn't been for the fact that I jumped out of the back of the van, landing on this stack of wood...


twisting my ankle...

nearly breaking it...

And, waiting in the car for my girl to run in and get a bag of ice post x-rays ( which were negative for any damage),  I would have never noticed the 20amp accessory cover!  

Sweet!

And, twenty-four hours later, I can almost walk without a limp.  Production should be up and running tomorrow morning! 


Sunday, September 26, 2010

Inch by inch...

Whew! 

That's about all I can utter, right now.  It's 9pm, I'm beat tired, and I feel as if I'm falling behind, every day.  I know that it's all going to be just fine, no matter what happens.  But, I'd feel a lot better taking off for a long spell out of town if I could just close the door on this portion of my journey. 

Don't get me wrong.  Good times and plenty of blog posts will highlight a life with the Roving Home.  I can hardly wait. 

So.

I shorted myself on some wiring for the electrical closet and had to head back out to West Marine.  Sunday mornings aren't so bad here in southern California, so I dashed over in pretty good time.  But, would you believe, my quick run for a few finishing parts cost me half of what I spent on Friday?  Good Lord! 

B.O.A.T.
Break Out Another Thousand

Whatever.  I can't avoid it and it has to be done.  I keep having to remind myself of all the rent/mortgage I'll be saving over the next couple of years.  Yes, two years.  The investment won't be worth anything if I drop out any earlier. 

But, after completing the wiring , I contemplated just what the whole process of removing and reassembling everything to the board would entail.  I just couldn't bear it.  

So, I carefully tipped up the board, eased it into the van, slid it over to the closet and lifted it up on end.  

  
So far, so good!


I just carefully pushed it against the wall and screwed it in.  That saved me about 2 hours of stupidity.  Much better.   Now, can you see that little hand drawn black circle just below the white inverter box?  That was the original placement for the exterior A.C. power hook up.

Obviously, things changed. 

I slid the receptacle placement over, broke out the trusty hole saw, and went to town on the wall of the van. 


Not too intrusive. 


I spent the rest of the day going back to Home Depot to correct my errors in conduit selection.  I need a lot of room for all of the wiring to come down from the ceiling, so I had to expand the diameter and re-drill the ceiling holes, etc etc.  Kind of a bummer, but once again, my mind is thinking about a billion things at once, so by the time I get right to the exact task at hand, I've certainly left a bit of the mystery unsolved. 

It's all good now!


And, you can see the hole for the receptacle that I drilled through.  Tomorrow, the agenda calls for the wiring of the solar panel, lighting and accessories.

I got to make some progress!    


Saturday, September 25, 2010

PHASE II -- Update

I'm about to head out for a night on the town with my best girl ( she'll laugh at that ) and a buddy of mine, but here is the progress I've made, today.  And, to think, I was planning on getting this wiring layout done in a couple of hours.  It's taken me nearly all day and I'm still short a couple of wires.  Imagine that! 

Enjoy!


This was the fantasy spacing, in order to give the work space room for servicing.

However...


This is what really happened.  Not too much of a change. 

I'm so OCD about this stuff that it pains me to see that black wire crossing over the red one in the background.  But, I just couldn't avoid it.  I think it's coming out pretty cool, though.


The right tool gets the job done...


Off to sip some Belgian Ale and to hear some great music. 

PHASE II -- Electrical

The infrastructure is complete.  Aside from the water tanks, which I ordered from a shop three miles from my house (imagine that), the framework is ready for the electrical install.  I think I broke the budget for that line item on my spread sheet, this afternoon.  After taking a deep breath, I handed my credit card across the counter to the friendly girl at West Marine.  But, the system will be top notch.

Here's what I got!

Starting with the A.C. inlet...


That is one buff receptacle, and not something you'd find at Camping World.

Here are the 60amp fuses that protect the charge controller from both sides.  I had no idea they came in the bayonet type that you'd find in your car's fuse block.  They're just much BIGGER!


And, that fuse fits nicely right in its own block!  Gotta love that!


For the inverter fuse, I needed a 100amp unit!  Wow.  It just amazes me sometimes how much larger everything becomes at 12 volts.  But West Marine had an answer for me, there, too.


The fuse rests right on top of those two bolts...


...and a plastic case snaps into place for your safety and mine.

Cool stuff.

Which brings me to the 12 volt distribution block.


It has its own protective cover, as well.


Now, this is one of the most amazing things.  I definitely have never seen one of these.  I'm not sure how long they've been around, but they're really cool. 
  
250 amps of protection is what I'll need, should the batteries begin to completely melt down -- the disaster fuse.


It slips over the terminal post...


...and that whole metal bar slides right down over the battery terminal.  Then I'll continue my circuit by dropping a wire over the top of that terminal post and screwing that down.

I read in an electrical book that the disaster fuse should actually be placed between the battery and the chassis on the negative side -- not what you would intuitively consider right off the bat, but I'll go back and confirm that.  I guess the logic is that you want to break the connection to the chassis for ultimate protection, as every other circuit is already protected with its own fuse.

The guy at the West Marine extended his warm hospitality by letting me crimp these wires at his work table.  If you've ever had to crimp 2/0 wire, you'll understand how awesome a gesture this was.  He saved me a bundle of money by not having to buy my own crimper, and a lot of time as well. 

But here's the finished result. 


That's cable worth 195 amps of electricity, according to the AWG table.  You may wonder what the heck I'd need that much for, but again, at 12 volts, the amperage draw can jump up pretty quickly with a 2000 watt inverter and a 60amp charge controller.  And, then you've got your 12 volt accessories.  Right now, with my 1000 watt inverter and  my 220 watt solar panel with 45amp solar charge controller, I'm looking at 150amps of electricity flow, with circuit protection of 160 amps.  I haven't even begun with my 12 volt accessories  It's amazing!  If I want to upgrade that inverter to 1500 watts, in the future, I'd be on the edge with the 2/0 cable.  And, that's not even taking into consideration a solar upgrade with at 60amp charge controller!  

And, what's funny, is that in everything I've read by RVers who have personal experience with solar systems, the authors have mentioned with uncanny consistency, that many RV manufacturers and installers will use inefficient wiring and will also routinely place components such as charge controllers and inverters much too far away from the battery  banks, thereby further taxing the system through line loss.  If you want some corroboration, check out my link to some "Grandfatherly advice on solar," and pick up a copy of "RV Electrical Systems" by Moeller.  There is also a self proclaimed cowboy who blogs from Montana.  He describes with some great humor and wit his whole solar conversion and wiring system in his 5th wheel.  I think I found his link on "Cheaprvliving.com."  Those three sources were the most memorable of all that I've read regarding this topic.        

But, enough of that!

I picked up a main disconnect...


...some bus bars...


And, there you have it. 

Today I'll be laying out the whole system on a piece of wood that will be the back wall of the electrical closet. 


Once I've drilled everything down, I'll remove it all, set the wall in place and put everything back!

Oh, here's the roof rack, installed.


I'm going to place the panel over those bars like a canoe, so I can install beside the panel a groovy black basket for other stuff I may want to load up during my extended camping trips.

My girl came up with a great idea.  She suggested that I find a way to make the back wall above the bed open to the outside for those nights beside the ocean. 


So, when I open the back door, all people will see is the storage area below the bed.  Above it will be the framed out set of closed doors to be opened at my leisure.  I'm actually pretty excited about it.  It might just be my favorite feature about the whole enterprise. 

Off to electricland!


Tuesday, September 21, 2010

I believe "frantic" is the operative term...

This past week propelled me into outer space.  First, I received a phone call from a work acquaintance, during which he offered me a job that would take me out of the country for several months.  Basically it was an offer I couldn't refuse.  So, I'm off to see the wizard, as of October 21st.

At the same time, another work project, previously on the back burner, has now suddenly risen up from the grave, demanding a portion of what remains as my time left here at home.  I really don't want to leave the van parked in storage for so long.  I'd rather my girl took it out for a spin and enjoyed herself while camping with her young ones.

So, the goal is to finish this thing in three weeks.  Yikes!  I'm not sure it's possible.  But, I'm sure as heck going to try.  I've been working on it every day since last Monday, from sun up till I can't see straight.

First, I must give a thousand "Thanks" to Les, who pointed out the potential problems with my choice for mounting the propane tank.  Sure enough, after a fair amount of research, I found out that the tank would be impossible to fill in the orientation I had placed it.

This is the way it was.


I obviously have zero experience with propane tanks, because when I saw the nozzle that one must use to attach the filling hose, my jaw dropped.  I made a gross assumption about how that all works.  

But, due to the early catch, I have remedied the situation and will just have to cut a small hole to place a little access door for filling.  

Here's the new orientation.


Whew! 

Luckily, a friend of mine came both for a visit and to see what all this business of living in a van is all about.  He offered his assistance, which I greatly appreciated.  Thanks, to my friend, Steve. 

On a lighter note...

I framed out my music console. 


The Iport slips into the top rectangle, while the stereo / CD player will slide into the bottom receptacle. 


The sink basin sits completely flush with the counter top so that the bed mechanism will be able slide out, unencumbered. 


And, the faucet will swing out of the way to accommodate the expanded bed frame.


My ridiculously expensive faucet.


But, worth every penny.  It solves a host of problems by swinging that way so tight to the wall.

Here's the stove.  A half inch cover / cutting board rests on top, flush with the counter's surface.

I still have to add some cosmetic metal all around the interior of the recess. 

Insulating the van has proven to be a very labor intensive process.


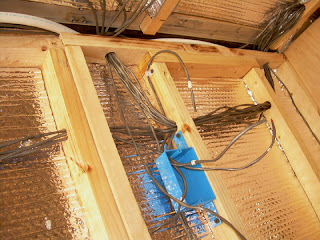
And, that's just the one layer.  I added electrical junction boxes which will be followed by another layer of insulation, stretched taught between those studs to form an air gap.

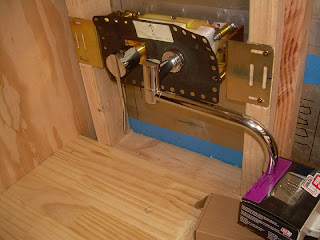
And, finally, the shower valve.


There may be hope, yet.  Fingers crossed!